A charcoal ring and diffuser plate turn a Weber Kettle into a smoker.
If you want steady heat, clean smoke, and long burns on a kettle, you’re in the right place. I’ve cooked hundreds of meals on this setup and know its quirks and wins. In this guide, I break down the weber kettle charcoal ring and diffuser plate like a pro, with simple steps and real results you can trust.
What a charcoal ring and diffuser plate actually do
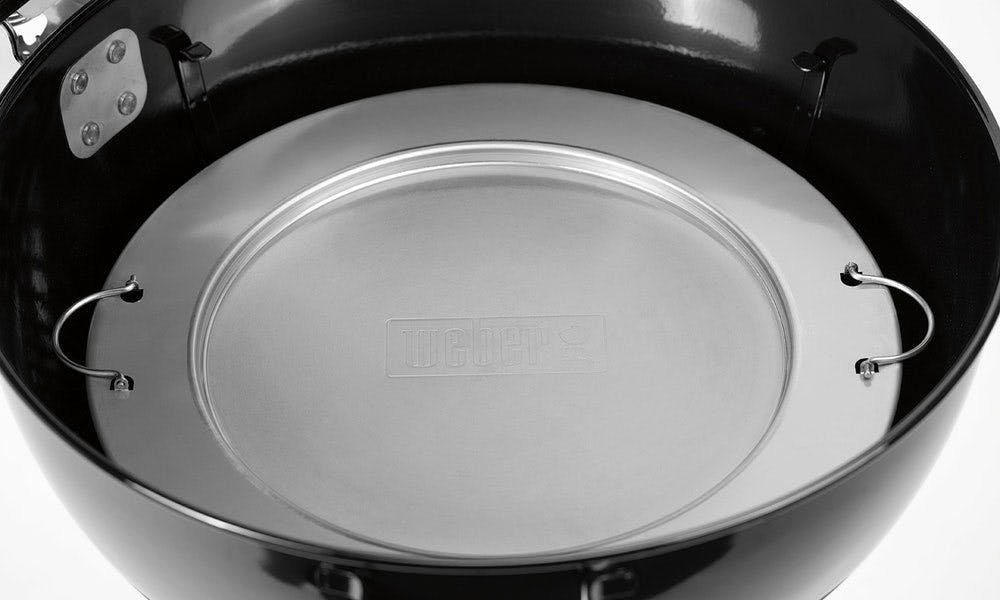
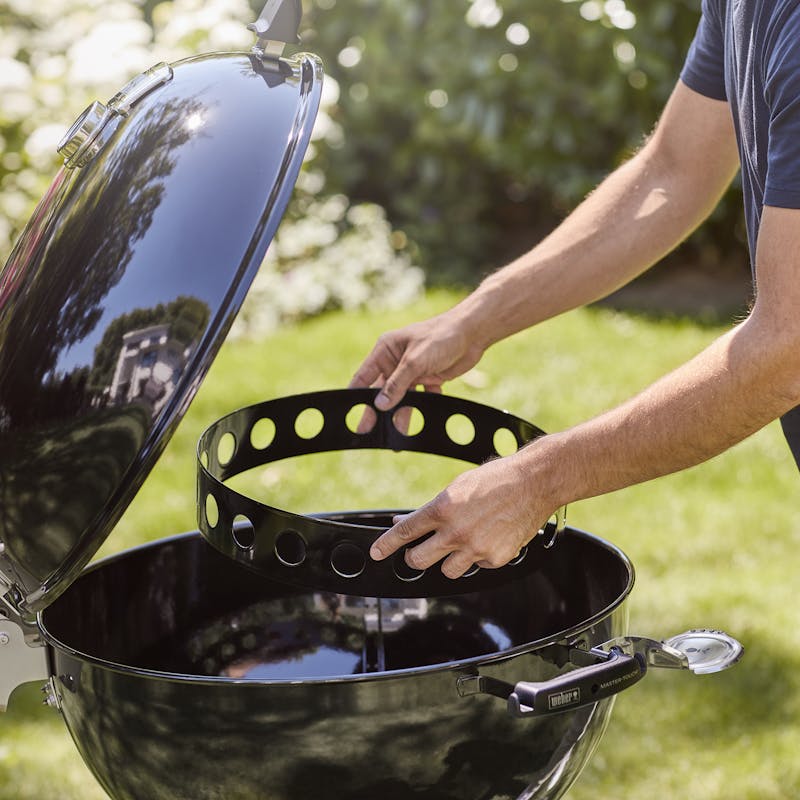
A charcoal ring corrals fuel so it burns in a slow, controlled path. The diffuser plate sits above the fire. It blocks harsh heat and spreads warmth across the grate.
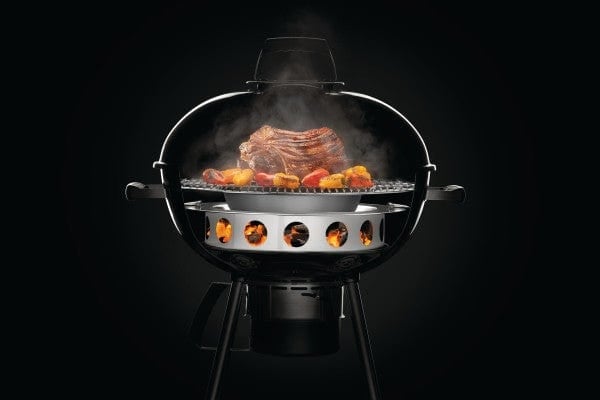
Together, they create even heat and long burn time. You get better smoke and fewer flare-ups. With a weber kettle charcoal ring and diffuser plate, the kettle acts like a small offset smoker.
This setup also helps with two-zone cooking. Sear over the coals, then finish over gentle heat. The diffuser keeps meat safe from direct flames.

Key benefits for your Weber Kettle
- Longer burns for low-and-slow cooks, often 8 to 16 hours with briquettes.
- Steadier temps across the grate, so ribs and butts cook more evenly.
- Better smoke quality with less bitter edge when vents are dialed in.
- Fuel savings, since the ring slows the burn and limits waste.
- Cleaner kettle, with ash kept inside the ring for easy dump.
I use a weber kettle charcoal ring and diffuser plate for ribs, pork butt, and even turkey. It makes the kettle calm and easy to run.
How to set up for long cooks
-
Pick fuel. Use quality briquettes for steady size and burn. Lump can work, but watch for gaps.
-
Load the ring. Fill it 70 to 100 briquettes for 225 to 275°F targets. Tuck 3 to 5 wood chunks around the outer edge.
-
Light a small starter. Use 8 to 12 lit briquettes. Pour them at one end of the ring for a slow Minion-style burn.
-
Add the diffuser plate. Place it above the fire area. Some plates sit on the charcoal grate. Others use a stand to raise them.
-
Set vents. Start with the top vent fully open. Set the lower vent at 1/8 to 1/4 open.
-
Let temps settle. Give it 15 to 25 minutes to preheat the plate. Aim for clean, thin blue smoke.
-
Place food. Put the lid vent over the meat. This pulls smoke across the food.
A weber kettle charcoal ring and diffuser plate shines when you do not rush. Make small vent moves and wait 10 minutes to see changes.
Real-world results and tips from the pit
On my 22-inch kettle, I use a 14-inch ring and a thick diffuser. A 9-pound pork butt holds at 250°F for 12 hours on one load. I start with 90 briquettes and four fist-size chunks of oak and cherry.
Wind and cold matter. On a breezy 50°F day, I still held 245 to 260°F. I turned the bowl 90 degrees once to shield the intake. Only one tiny vent tweak was needed.
Common wins and lessons
* Keep the lid vent over the meat to draw smoke across.
- Do not stack wood on top of the lit coals. It can flare.
- If temps creep up, close the lower vent a hair and wait.
This is where the weber kettle charcoal ring and diffuser plate earns trust. It keeps the cook boring, which is perfect for barbecue.
Choosing the right size and materials
Match the ring to your kettle. For a 22-inch kettle, a 13 to 15-inch diameter ring works well. For an 18-inch kettle, go a bit smaller, around 11 to 12 inches. Large 26-inch kettles can use an 18 to 19-inch ring.
Materials matter. Thick stainless steel resists rust and warping. A diffuser plate should be stout. Steel or cast iron holds heat well. Plates with a small lip help catch drips. Small vent holes or slots can ease airflow under the plate.
If you want to future-proof, pick 304 stainless. It costs more but lasts. I run a 3/16-inch steel plate and it stays flat. It pairs great with the weber kettle charcoal ring and diffuser plate setup.

Charcoal ring vs snake method vs Slow ‘N Sear
The snake method lines briquettes around the edge of the kettle. It works well but can be fiddly in wind. It also shifts heat as the fire moves.
A Slow ‘N Sear is a premium basket with a built-in water trough. It sears like a champ and holds temp well. It costs more and takes grate space.
A ring plus diffuser is simple and flexible. It fits more sizes and brands. It is great for big cooks and steady heat. If your focus is low-and-slow, the weber kettle charcoal ring and diffuser plate is hard to beat.

Common mistakes and how to avoid them
- Overfilling the ring. Too much lit fuel spikes temps early. Start small and build up.
- Smothering the fire. Ash can choke air. Tap the legs to drop ash mid-cook.
- Blocking the top vent. Keep it wide open. Control with the bottom vent.
- Over-smoking. Two to four chunks are enough for long cooks. White billows mean wait.
- Lifting the lid too much. Every peek adds 25 to 50°F swings. Trust your probe.
- Placing the diffuser off-center. Center it over the fire zone for even heat.
These fixes keep the weber kettle charcoal ring and diffuser plate steady and clean.

Maintenance and safety
Let ash go cold. Then dump and brush the ring. Scrape the plate with a putty knife while warm. A quick oil wipe can help prevent rust on plain steel.
Check for warps or cracks. Tighten any bolts or tabs. Wear heat-proof gloves when moving hot metal. Store parts dry to stop rust. Food safety first: keep drips off the rim and clean grates often.
Care helps the weber kettle charcoal ring and diffuser plate last for many seasons.

DIY options that actually work
You can build a ring from expanded metal. Cut to size, bend, and bolt the ends. Avoid galvanized parts near heat. Zinc fumes are not safe.
A heavy pizza pan can act as a diffuser. Drill a few small holes near the edge for flow. Some folks stack two charcoal baskets inside a larger ring for long burns.
DIY saves cash and still pairs well with a weber kettle charcoal ring and diffuser plate. Test airflow with small fires first.
Fuel, wood, and vent charts (quick reference)
Target 225 to 250°F
- 70 to 90 briquettes in the ring.
- 2 to 3 wood chunks.
- Top vent open. Bottom vent 1/8 open.
Target 275 to 300°F
- 90 to 120 briquettes.
- 3 to 4 wood chunks.
- Top vent open. Bottom vent 1/4 to 1/3 open.
Target 325 to 375°F for roast or chicken
- 120+ briquettes.
- 2 to 3 smaller chunks.
- Add a small gap in the diffuser if skin needs to crisp.
Weather notes
- Wind needs more intake or a windbreak.
- Cold weather may need 10 to 20% more fuel.
These starting points work great with a weber kettle charcoal ring and diffuser plate. Tweak for your fuel and your yard.
Troubleshooting temperature swings
If temps rise fast, close the lower vent a sliver. Give it 10 minutes. Check that the lid is fully seated and leaks are sealed.
If temps fall, stir the top of the fuel with a long tool. Knock ash down by tapping the legs. Open the bottom vent a touch.
If smoke turns thick and white, wait for it to clear. Add wood in small doses. A calm fire makes sweet food. This holds true with a weber kettle charcoal ring and diffuser plate.
Frequently Asked Questions of weber kettle charcoal ring and diffuser plate
Will this fit my 22-inch Weber Kettle?
Most rings and plates list exact size. For a 22-inch kettle, look for a 13 to 15-inch ring and a plate that covers the fire zone.
How long can it run without refueling?
With good briquettes, 8 to 12 hours at 250°F is common. In cold or wind, expect 6 to 10 hours.
Do I still need water in the kettle?
Not always. The diffuser evens heat on its own. A small water pan can help with moisture and temp stability on long cooks.
Can I sear steaks with the diffuser in place?
You can, but it is slower. For a hard sear, remove the plate or use a direct zone next to it.
What wood works best with this setup?
Oak, hickory, and fruit woods like apple and cherry are great. Use 2 to 4 chunks for long cooks and avoid piling them on lit coals.
Is lump charcoal okay in the ring?
Yes, but pick medium pieces and pack them well. Briquettes are more stable and give a smoother burn.
Conclusion
A charcoal ring and diffuser plate turn a simple kettle into a steady, low-stress cooker. You get stable temps, clean smoke, and long burns with less fuel and fuss. This combo helps food shine, from ribs to turkey.
Test the steps above on your next weekend cook. Start small, take notes, and dial in your vents. When you are ready, share your results, subscribe for more guides, or drop a question so we can help you master your next cook.